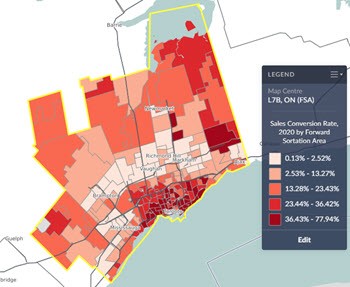
Requirements
- The import file must be in CSV format. XLS or DBF formats will not work.
- The file must have a location ID column in the form of a geographic ID. When you export data from SimplyAnalytics, the geographic ID will always be included – this is a quick way to pull the IDs you need for your import.
- The import file must contain only one geographic unit. For example, all Census Tracts or all Forward Sortation Areas. There is an available option to add other units of geography.
Getting Started
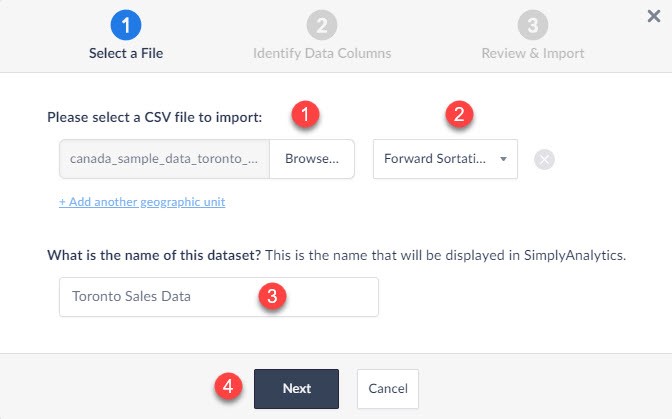
Select your username (or "Guest") towards the top-right of the interface, then Import Data – this will open the Import Data panel that contains three steps. This guide & attached sample data (sales data for FSAs in Toronto, ON) will help you get started.
① Select browse to add in your CSV file
② Specify the geographic unit of the import
③ Provide a name for your imported dataset
④ Click on Next to proceed
Identifying Data Columns & Data Types
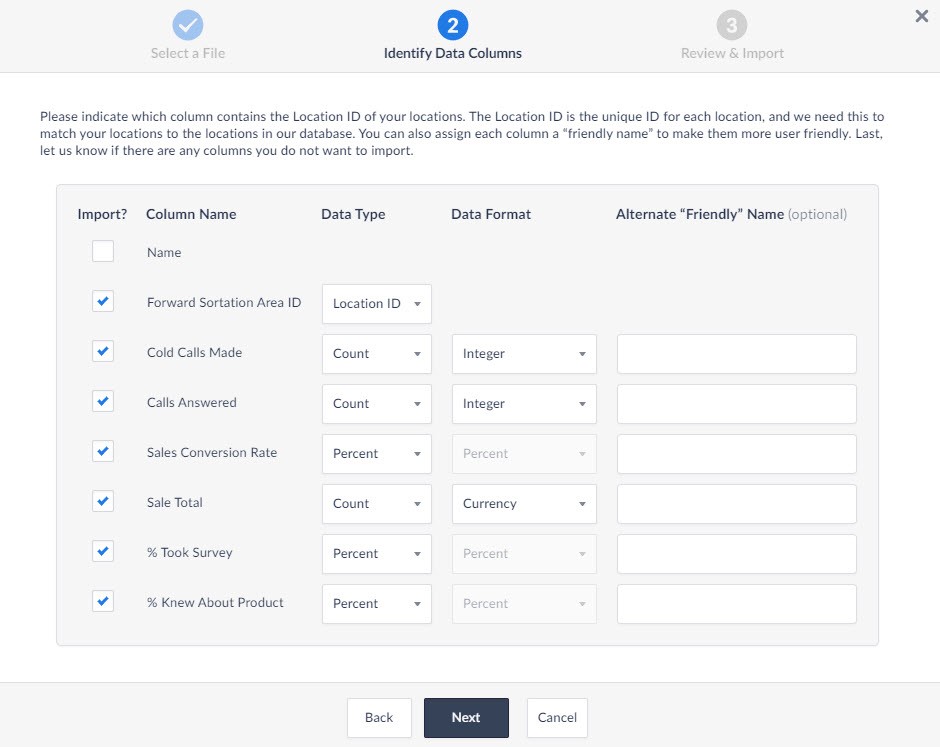
The second step in the import process involves specifying data types and formats for your imported data. SimplyAnalytics will automatically parse through the CSV to identify the column names.
If you have a name field in your import to go along with your geographic ID, Uncheck the Name under the Column Name heading within the panel – the geographic ID is the only Location ID acceptable. Leaving the name field checked will cause an error in the import.
Go through each column name in the panel and specify the correct data type and format.
IMPORTANT:
You must always indicate the geographic ID column name as the Location ID data type. Failure to do so will result in a failed import.
Available Data Types:
- Count
- Mean
- Median
- Percent
Available Data Formats:
- Integer
- Currency
- Two Decimal Places
Final Step
The final step in the import process is to make sure that your import specifications are correct.
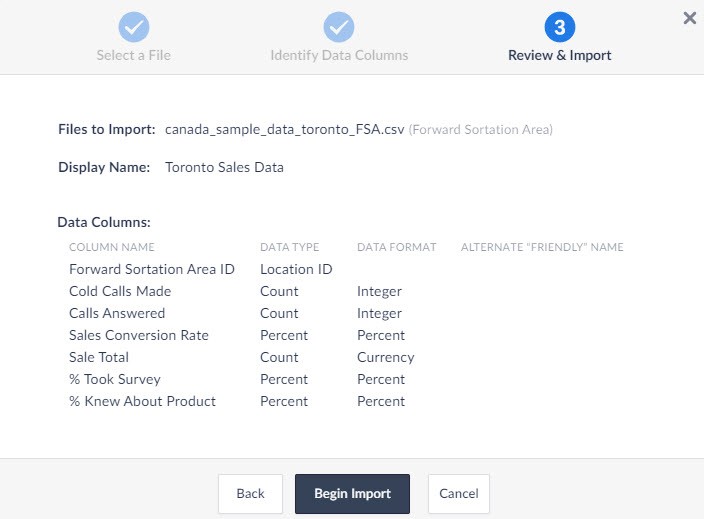
If something looks wrong, or you would like to change your import, select Back
If everything appears correct, select Begin Import to complete the process.
Accessing the Data
There are two ways to access your data. 1) Within the category search under the Data tab, and 2.) Within the Data Folder search under the Data Tab.
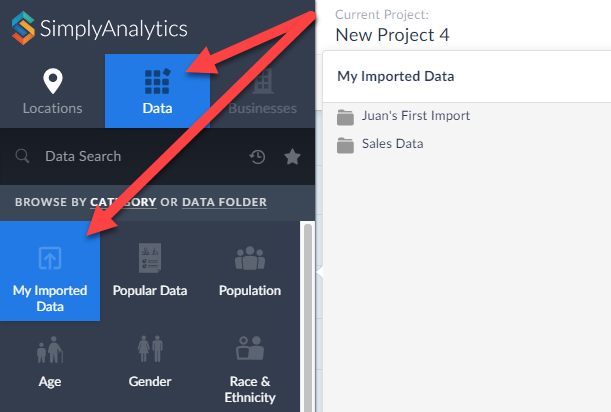
Or:
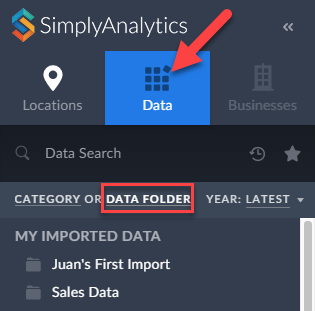
Interacting with the Data
With the sales data for all FSAs in Toronto, ON imported – you are welcome to begin analyzing & co-mingling the data with other datasets in the various reports.
Because data exists only for those geographies stated above, using any other geography will result in N/A. For example, adding an FSA in Alberta will result in N/A or a blank map.
